前言
假设服务器上已经安装并可正常运行网页服务器,如Apache或Nginx等
本文档中环境:
Ubuntu 17.10 x64
Apache2 网站根目录/var/www/html/
有关FreshRSS
- 官网: https://freshrss.org
- 演示: https://demo.freshrss.org/
- Github: https://github.com/FreshRSS/FreshRSS
安装
安装依赖包
FreshRSS需要以下依赖,如果已经安装了请无视。
sudo apt-get isntall git -y
# For Ubuntu <= 15.10, Debian <= 8 Jessie
sudo apt-get install php5 php5-curl php5-gmp php5-intl php5-json php5-sqlite -y
sudo apt-get install libapache2-mod-php5 -y	#For Apache
sudo apt-get install mysql-server mysql-client php5-mysql -y	#Optional MySQL database
sudo apt-get install postgresql php5-pgsql -y	#Optional PostgreSQL database

# For Ubuntu >= 16.04, Debian >= 9 Stretch
sudo apt install php php-curl php-gmp php-intl php-mbstring php-sqlite3 php-xml php-zip -y
sudo apt install libapache2-mod-php -y	#For Apache
sudo apt install mysql-server mysql-client php-mysql -y 	#Optional MySQL database
sudo apt install postgresql php-pgsql -y	#Optional PostgreSQL database
安装完毕后,重启网页服务器
service restart apache2
安装FreshRSS本体并授权
安装
# For FreshRSS itself (git is optional if you manually download the installation files)
cd /usr/share/
sudo apt-get install git
sudo git clone https://github.com/FreshRSS/FreshRSS.git
cd FreshRSS
授予权限
# Set the rights so that your Web server can access the files
sudo chown -R :www-data . && sudo chmod -R g+r . && sudo chmod -R g+w ./data/
# If you would like to allow updates from the Web interface
sudo chmod -R g+w .
链接到网页服务的目录
# Publish FreshRSS in your public HTML directory
sudo ln -s /usr/share/FreshRSS/p /var/www/html/FreshRSS
# Navigate to http://example.net/FreshRSS to complete the installation
# (If you do it from localhost, you may have to adjust the setting of your public address later)
# or use the Command-Line Interface
初始化
打开网站http://yourIP/FreshRSS,进行基本配置,不赘述。
第二页为检查依赖及权限,请根据信息完善。
更新FreshRSS
# Update to a newer version of FreshRSS with git
cd /usr/share/FreshRSS
sudo git pull
sudo chown -R :www-data . && sudo chmod -R g+r . && sudo chmod -R g+w ./data/
使用第三方阅读器
服务端配置
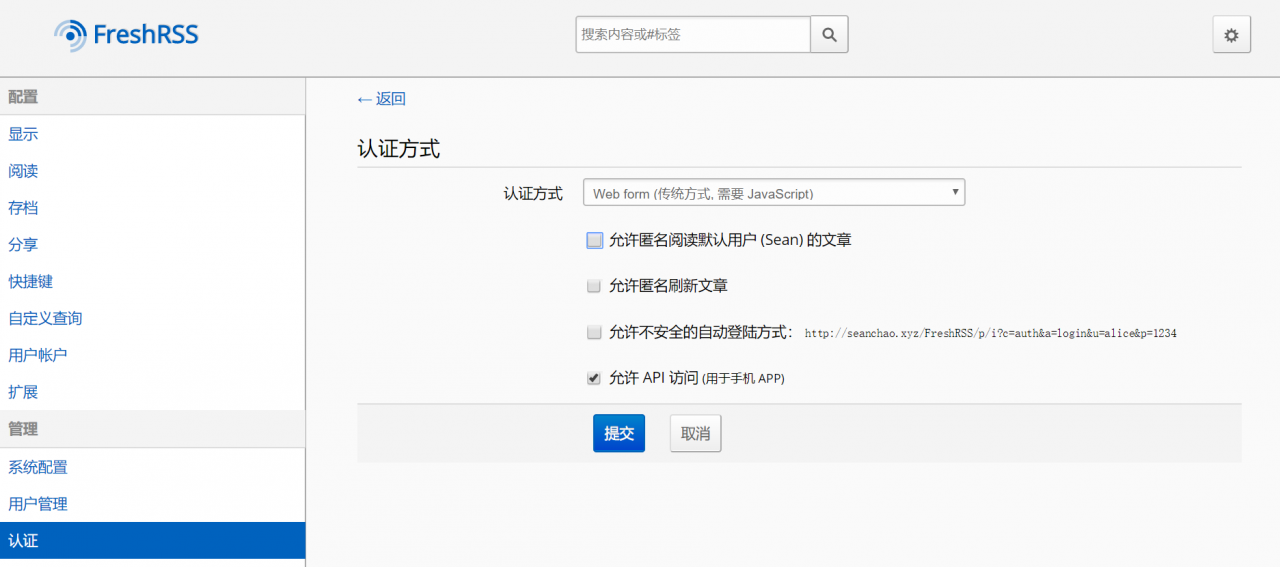
开启并设置密码
在设置->管理->认证中勾选“允许API访问”并提交
在设置->配置->用户账户中设置“API密码”并提交
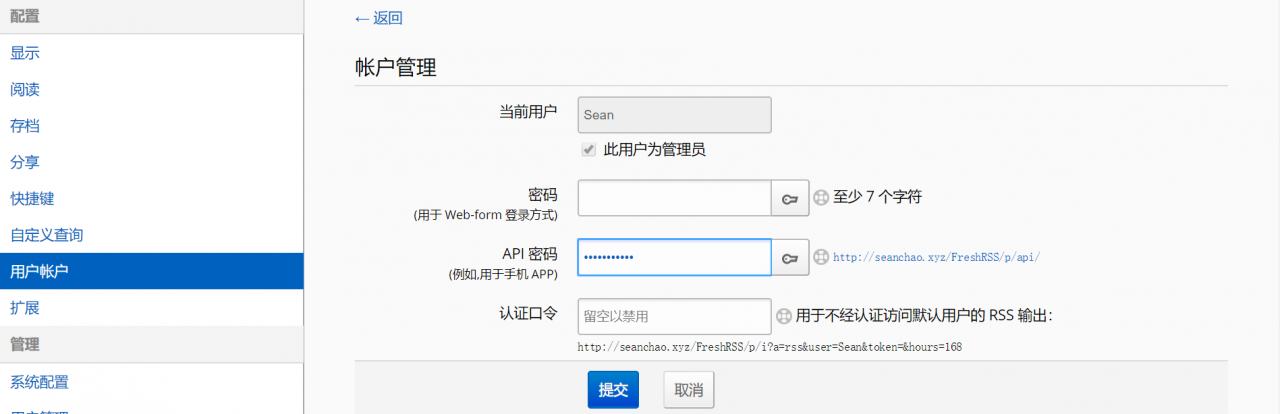
检查配置
点击“API密码”框旁边的链接,检查配置。
在接下来的页面中点击第一个链接 “Check full server configuration”
- 如果你看到了PASS,那么配置已经完成。
- 如果你得到了错误,如Bad Request或Not Found,那么你的网页服务器可能不接受
%2F作为/
错误处理
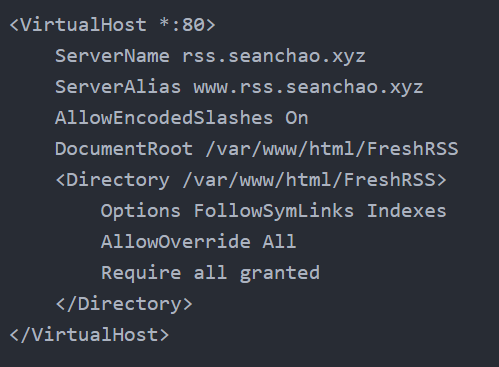
打开Apache的配置文件
我在这里使用了虚拟主机配置,使得访问rss.example.xyz等效于访问example.xyz/FreshRSS
在配置中添加一行AllowEncodedSlashes On
随后重启Apache,即可解决问题。
这时候请使用rss.example.xyz重复上述步骤检查配置,得到PASS就OK啦。
客户端配置
这里安利一下一款好用的RSS阅读器FeedMe,下载渠道:酷安ORGoogle Play
打开后点击FreshRSS
域名中填写刚才在配置检查页中出现的链接,形如http://freshrss.example.net/p/api/greader.php
Username与密码按照先前API设置填写。
完成后登录即可享用。
参考资料与相关链接
本文出自:http://blog.seanchao.xyz/2018/02/FreshRSS-Installation


文章评论
谢谢。文章很有用。我的FreshRSS能正常使用了。
@散森 客气,有用就好。RSS我个人很喜欢,因为每天一个地方能获取很多有用信息。